How To Use Okta’s QFlow.ai Integration
As QFlow.ai has grown over the last twelve months, one area of our focus has been supporting our most security-minded customers’ needs.
Many of these types of enhancements take place behind the scenes. So when they don’t, we celebrate a bit…
We are pleased to announce that QFlow.ai is now Okta-verified and available in the Okta Integration Network.
🎉🎉🎉
For Okta users, this means a point-and-click integration that ensures seamless access to the QFlow.ai platform. The integration adds an added layer of access control using the OpenID Connect (OIDC) and OAuth2.0 protocols. Once configured, non-administrative users are only able to access QFlow.ai if they have been explicitly invited in the QFlow.ai console and have been assigned the QFlow.ai application in Okta.
If your organization uses Okta, but does not yet use QFlow.ai to drive business decisions, you can sign up for a free trial here or book a demo with our team.
If you are an existing Okta and QFlow.ai customer, read on to set up Okta SSO for your QFlow.ai account.
Set up QFlow.ai to authenticate your users with Okta
If you use Okta at your organization, getting started is easy:
- Navigate to the user management page in the QFlow.ai console. Select Okta Open ID Connect (OAuth2.0) and click ‘UPDATE AUTH SETTINGS’.
- Also from the user management page, invite the user(s) who should have access to QFlow.
-
Ask an Okta administrator to locate the QFlow.ai application in the Okta App Integration Catalog.
-
You or your Okta administrator will have to copy and paste three pieces of information from Okta into the User Management page:
- Client ID maps to Client ID
- Client Secret maps to Client Secret
- Okta domain maps to Issuer

-
In Okta, assign the QFlow.ai app to the users who should have QFlow.ai access from step 2.
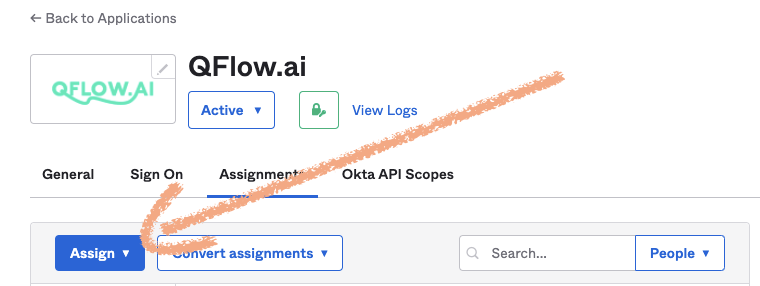
-
In QFlow.ai, send invitations.
- Select the new users who should be invited to the QFlow.ai app.
- Click ‘SEND INVITE.’
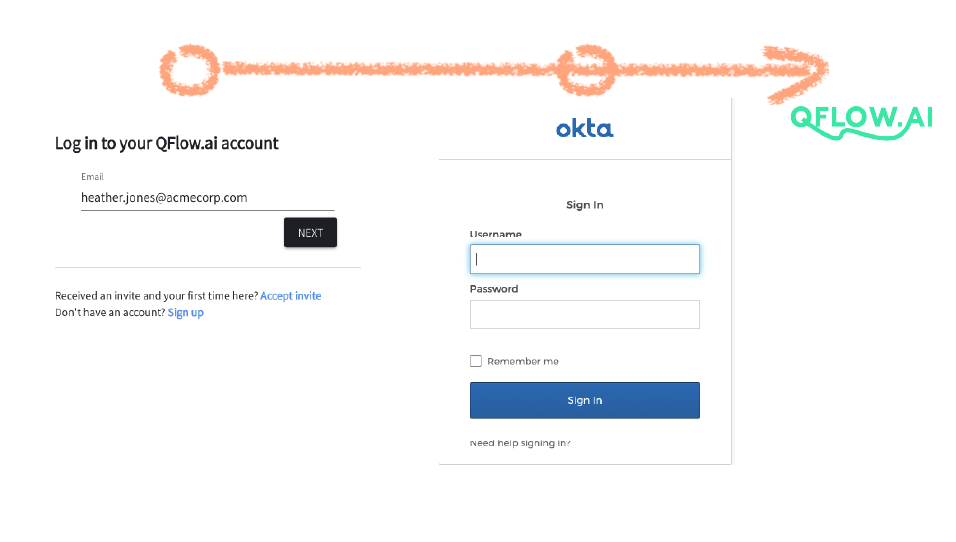
- Invited users will receive an email from QFlow.ai inviting them to get started. When the user enters her email address on the QFlow.ai login page, she will be re-directed to Okta for authentication.
-
Employees who are granted access in QFlow, have the QFlow app assigned in Okta, and successfully authenticate with Okta will be re-directed to a QFlow session.
For more information about your employees’ experience authenticating with Okta, visit our FAQ page (requires QFlow.ai account).
Removing access for users
Either removing the user’s app assignment in Okta or marking the user as inactive in QFlow.ai will remove access. We recommend doing both to keep things clean. 🚿
To remove access via the QFlow console:
- Navigate to the Users Management page.
- Select the user(s) you wish to deactivate.
- Click ‘DEACTIVATE’ at the top-right of the table.
Need help?
Our team is always here to help. Just find a time on our calendar.